From your dashboard you can go to your list of active or your list of inactive clients. You can also view these lists from your menu. We'll take a closer look at both lists and tell you more about the client settings and coda files.
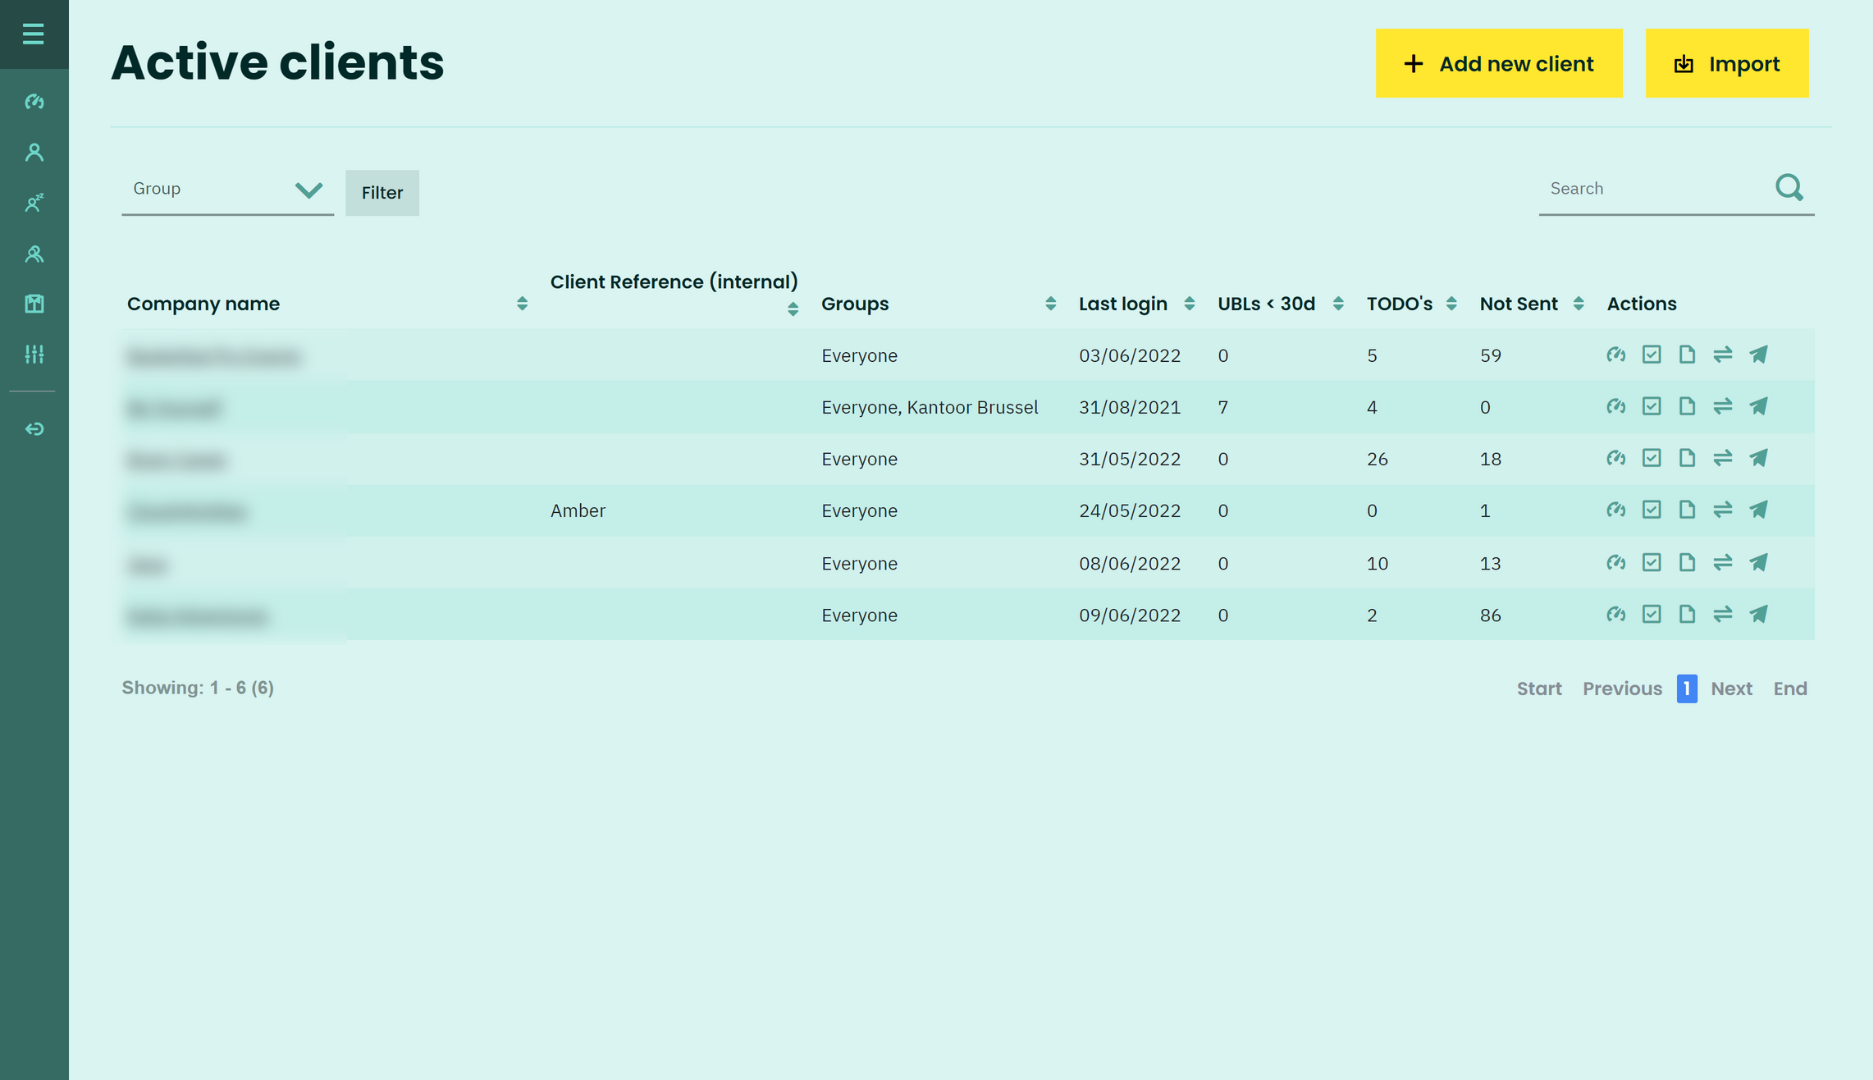
Active clients
In this list you will find an overview of all your active clients. You'll also see
- to which groups they belong
- when they logged in to their OkiOki account for the last time
- how many UBLs were sent to the accountant in the last 30 days.
- how many to-do's they have on their list
- and how many documents on their account have not yet been sent to the accountant.
Finally, you can also click straight through to the dashboard, the to-do's, the document or transaction archive or to the unsent documents of your customers.
On the top left, you can also filter clients according to the groups they have access to and on the top right, you can always perform a search to easily find a client in your list.
Another important thing to know is that the figures in the overview (to-do's, UBLs, sent documents etc.) may differ from the figures on the dashboard of the client itself. This is because the figures in the list are refreshed every half hour, while the dashboard itself is always a representation of the situation at that very moment.
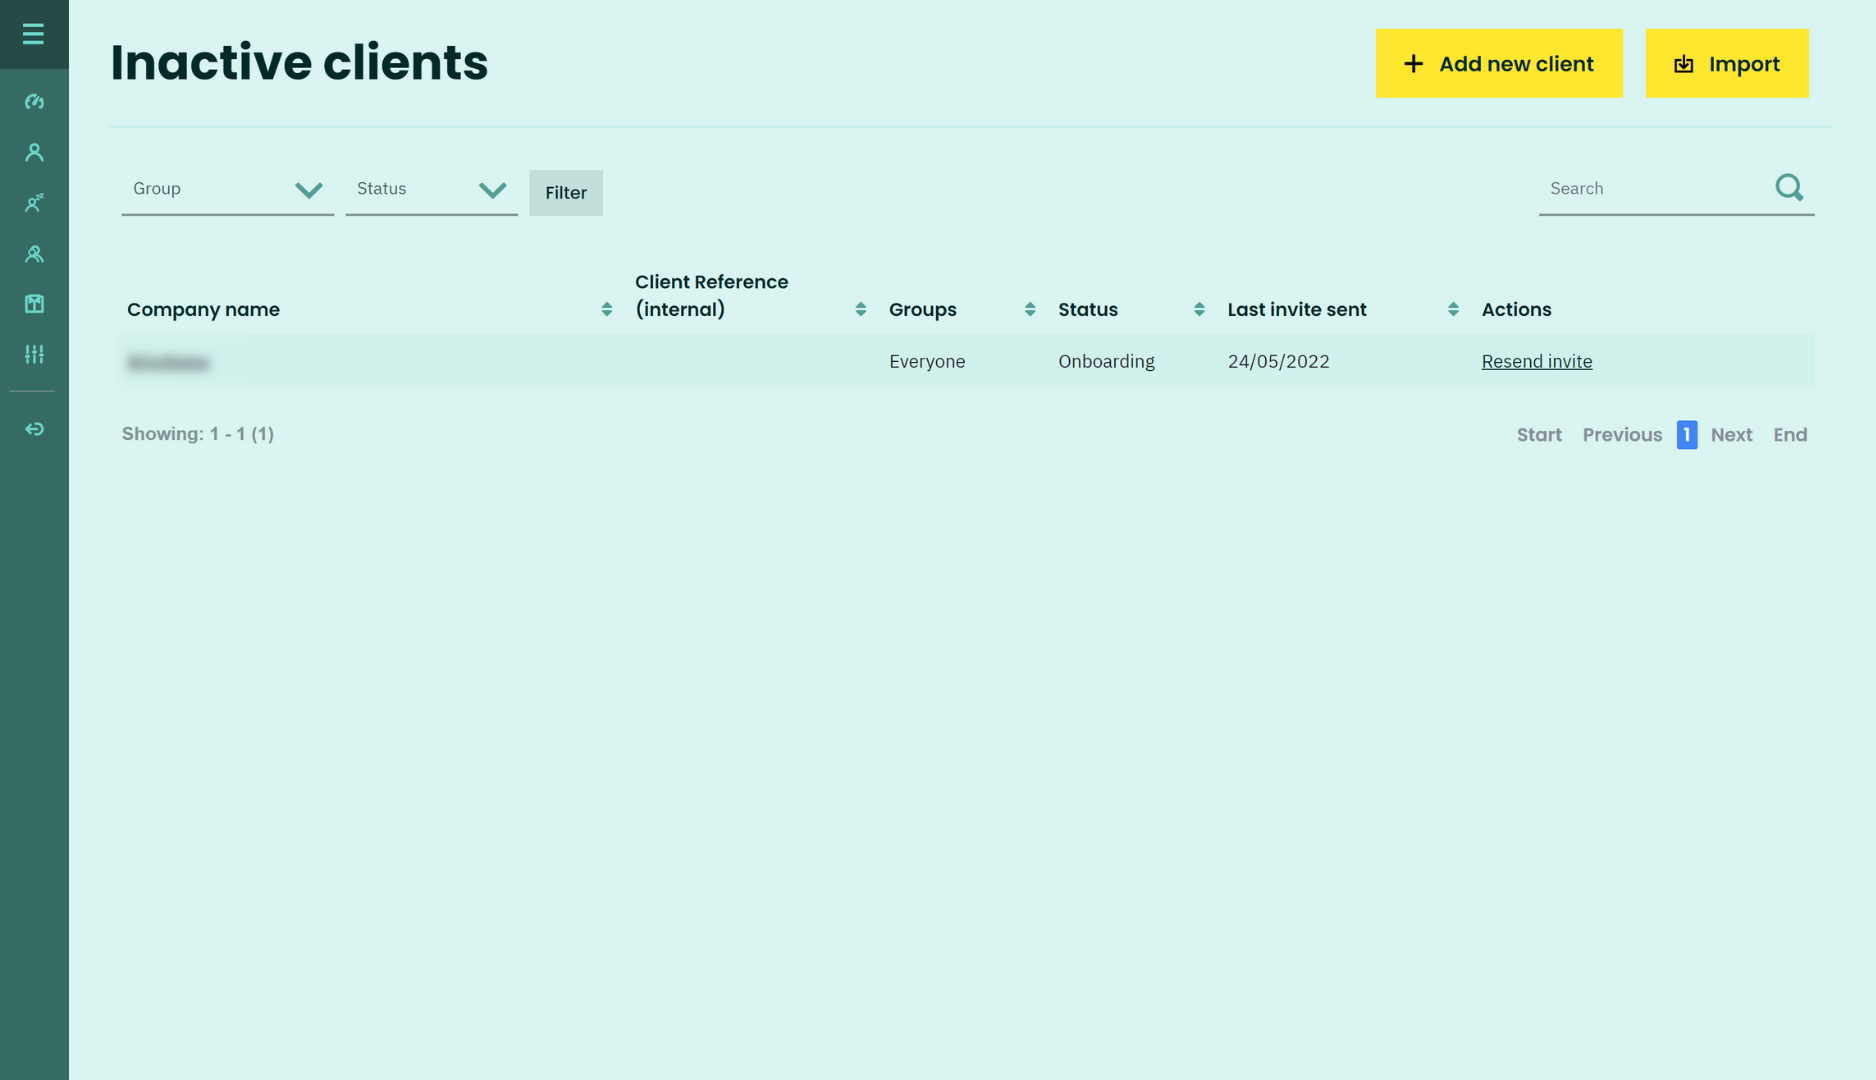
Inactive clients
In the list of inactive clients you will see an overview of all your inactive clients. These can be clients who have been invited but not yet onboarded, clients who have started the onboarding but not yet completed it or clients who are no longer active with OkiOki.
In the overview you will see for each client
- to which groups he or she belongs
- what the status of his or her account is
- when the client was last invited to activate his or her account
and you can also immediately send a new invitation to the client.
Finally, you can also filter customers on the top left by group or status. In the top right corner you can always look up a customer in your list.
Client settings
If you click on a particular client in your list of active or inactive clients, you can view and edit all data and settings for that client (see 3. Add new client).
Important: Please note that the client's email address and phone number can only be edited if the client has not yet started onboarding. So you can still change these data if you have only sent an invitation to the client, but once the client actually starts onboarding, and thus a client record is created, these data are no longer editable for security reasons. So make sure that this data is definitely correct. If you still want to change the data afterwards, when the client is already onboarded, please contact support@okioki.be.
Coda files
In the client settings you can also add coda files. You can only set this up after the client has linked his or her account.
To set this up, first choose a coda transfer method.
- Manually
- FTP/SFTP
- Cloud storage
If you choose email, FTPs/SFTP or cloud storage then you have to fill in the following information:
- A folder name for the coda files: Within this folder, OkiOki will then generate an annual folder (e.g. 2022) containing a folder for the client's specific account.
- The date from which you want to receive coda files. This way you can make this fit with the existing coda settings (e.g. via CODABOX).
It is important to note that we can retrieve coda files up to several days or up to several weeks back. We generate coda files based on the start and end balances we receive from the bank at each synchronization. For transactions carried out longer ago, we do not always have that data. As a result, the correct generation of those files is not possible.
- The sequence number of the file that you expect on the chosen date. This way you can match that with the last received file from your previous CODA supplier.
Ready for the next step? Let's go over the general settings for your accountancy portal.
Comments
0 comments
Please sign in to leave a comment.